WordPressカスタマイザーにエディタ項目を実装する方法
明けましておめでとうございます。2021年もどうぞよろしくお願いします!
新年一発目の記事はWordPressのカスタマイザーについて。
カスタマイザーでは下記の項目が追加できるようになっています。
1行テキスト、複数行テキスト、チェックボックス
ラジオボタン、セレクトボックス、固定ページのドロップダウン
画像アップロード(URL取得)、画像アップロード(画像ID取得)、ファイルアップロード
カラーピッカー、サニタイズ、メールアドレス、URL、番号
ラジオボタン、セレクトボックス、固定ページのドロップダウン
画像アップロード(URL取得)、画像アップロード(画像ID取得)、ファイルアップロード
カラーピッカー、サニタイズ、メールアドレス、URL、番号
ですが上記以外の自作のオリジナル項目を追加することも可能です。
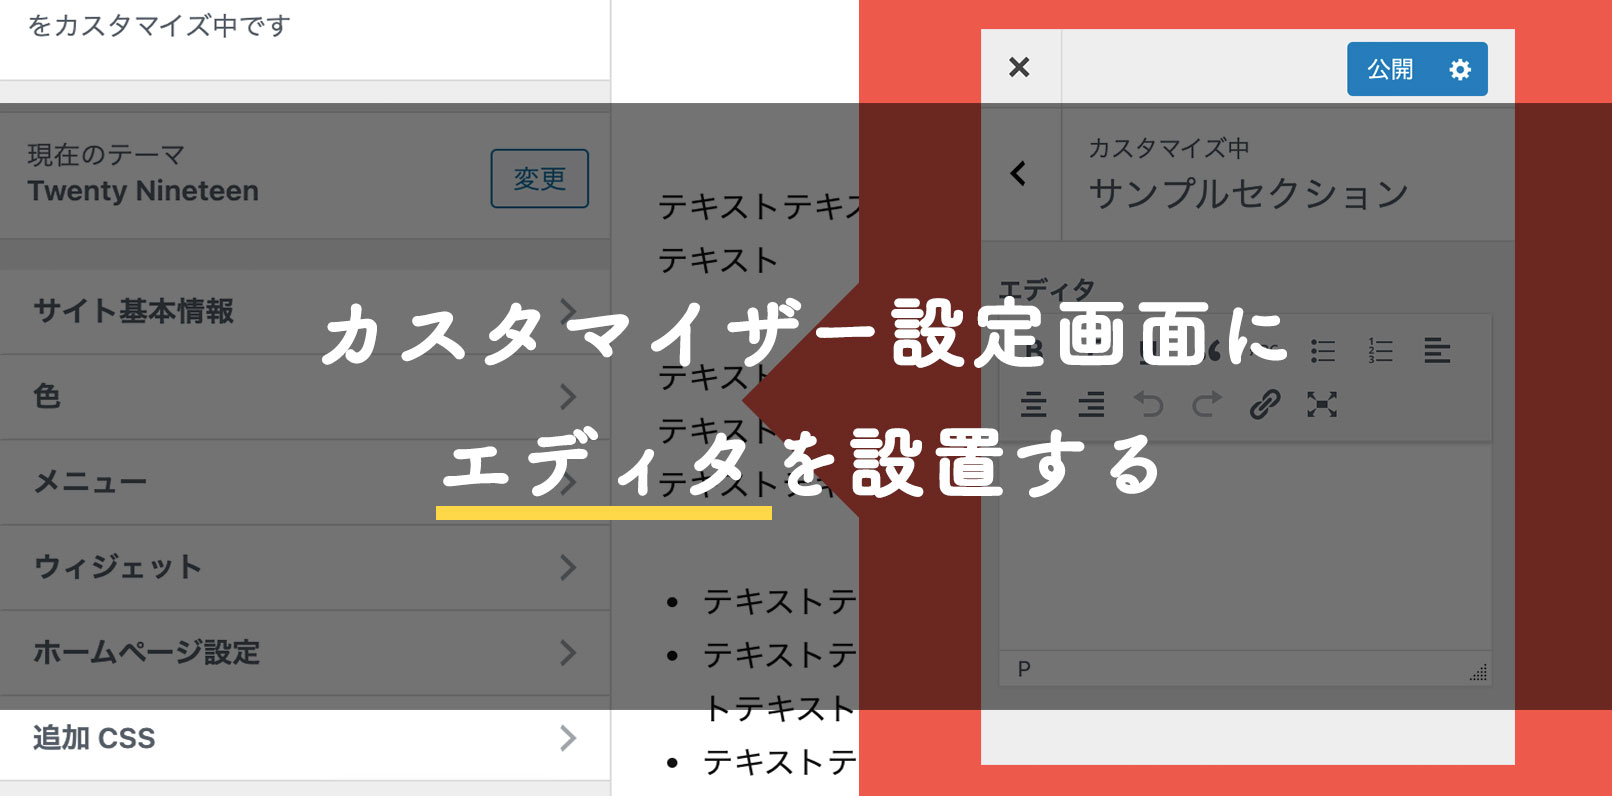
今回はカスタマイザー画面にエディタを追加する方法を紹介します。
※ この方法で実装するエディタはビジュアルモードです(コードモードへの切り替えは不可)
エディタの実装方法
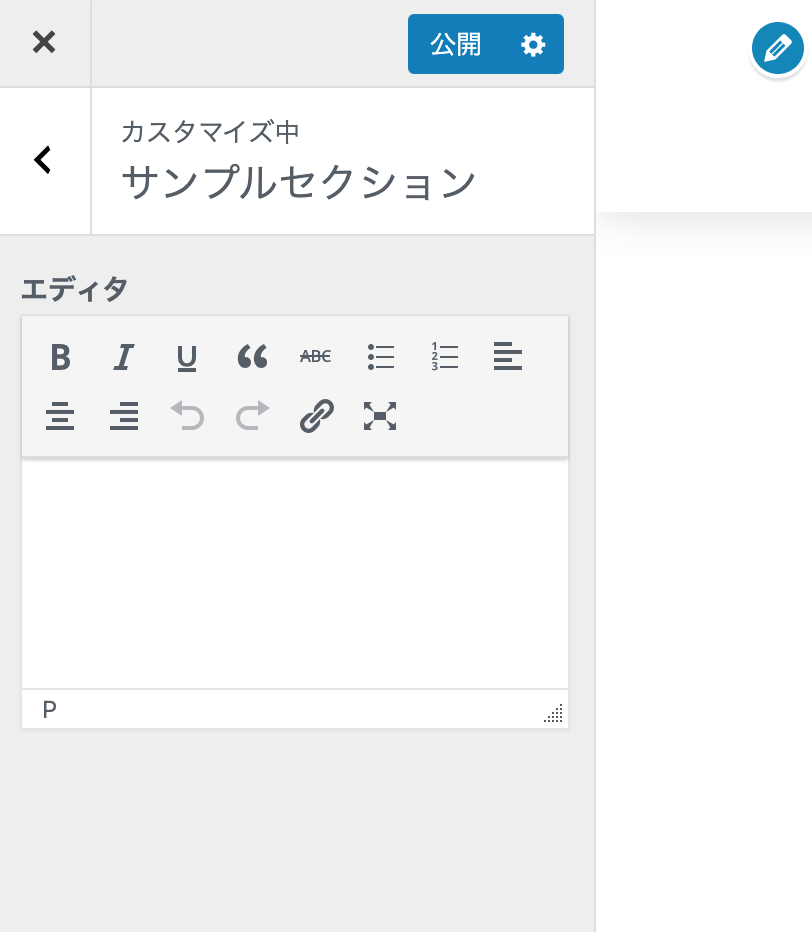
完成イメージ
通常のコードに専用のクラスを追加して実装していきます。
コードはこちらを参考にさせていただきました。
functions.php
//クラスを定義
<?php
if (class_exists('WP_Customize_Control')) {
	class WP_Customize_Teeny_Control extends WP_Customize_Control {
		function __construct($manager, $id, $options) {
			parent::__construct($manager, $id, $options);

			global $num_customizer_teenies_initiated;
			$num_customizer_teenies_initiated = empty($num_customizer_teenies_initiated)? 1: $num_customizer_teenies_initiated + 1;
		}
		function render_content() {
			global $num_customizer_teenies_initiated, $num_customizer_teenies_rendered;
			$num_customizer_teenies_rendered = empty($num_customizer_teenies_rendered)? 1: $num_customizer_teenies_rendered + 1;
			$value = $this->value();
?>
<label class="customize-control-title">
	<span class="customize-text_editor"><?php echo esc_html($this->label); ?></span>
	<input id="<?php echo $this->id ?>-link" class="wp-editor-area" type="hidden" <?php $this->link(); ?> value="<?php echo esc_textarea($value); ?>">
<?php
	wp_editor($value, $this->id, [
		'textarea_name' => $this->id,
		'media_buttons' => false,
		'drag_drop_upload' => false,
		'teeny' => true,
		'quicktags' => false,
		'textarea_rows' => 5,
		'tinymce' => [
			'setup' => "function (editor) {
				var cb = function () {
					var linkInput = document.getElementById('".$this->id."-link');
					linkInput.value = editor.getContent();
					linkInput.dispatchEvent(new Event('change'));
				}
				editor.on('Change', cb);
				editor.on('Undo', cb);
				editor.on('Redo', cb);
				editor.on('KeyUp', cb); // Remove this if it seems like an overkill
			}"
		]
	]);
?>
</label>
<?php
			if ($num_customizer_teenies_rendered == $num_customizer_teenies_initiated) do_action('admin_print_footer_scripts');
		}
	}
}

//(追加する場合)セクションを定義
$wp_customize->add_section(
	'sample_sec',
	array(
		'title' => 'サンプルセクション',
		'priority' => 50,
		'capability' => 'edit_theme_options',
	)
);
//セッティングを定義
$wp_customize->add_setting(
	'sample_editor',
	array(
		'default' => '',//初期値
		'sanitize_callback' => 'wp_filter_post_kses',
	)
);
//コントロールを定義
$wp_customize->add_control(
	new WP_Customize_Teeny_Control(
		$wp_customize,
		'sample_editor',
		array(
			'section' => 'sample_sec',
			'settings' => 'sample_editor',
			'label' => 'エディタ',
		)
	)
);
//ショートカット編集ボタン
$wp_customize->selective_refresh->add_partial(
	'sample_editor',
	array(
		'selector' => '.sample_editor',//エディタのセレクタ
	)
);
出力先のテンプレート
<?php
$sample_editor = get_theme_mod('sample_editor');
if (!empty($sample_editor)) { ?>
	<div class="sample_editor">
		<?php echo $sample_editor; ?>
	</div>
<?php? } ?>
コードの解説
- functions.phpではエディタ用の「WP_Customize_Teeny_Control」クラスを定義。add_controlでそのクラスを参照している。
- add_settingのsanitize_callbackでHTMLタグのコンテンツをサニタイズできる’wp_filter_post_kses’を指定。
- get_theme_modは第一引数にキー名、第二引数は任意でキーが存在しない場合の戻り値が設定できる。
ここではキーが存在しない、もしくはキーが存在するが空文字列の場合はdiv.sample_editorは出力されないように設定。
初期値を登録したい場合、この第二引数とadd_settingの’default’にHTMLコード(例:<p>テキストテキストテキストテキストテキストテキスト</p>)を設定する。
動作確認したバージョンはWordPress5.5.3、PHP7.3.2です。
雑記
カスタマイザーの設定項目でクライアントの操作が完結できるようにしたいと思って調べていたら、いくつか英語で事例を見つけることができました。
ただ今のバージョンで動いたのは上記のみ。
現在お使いのバージョンで問題なく動作するか、しっかり検証してから実装をお試しください。
関連/参考にさせていただいたURL
- TinyMCE in customizer
テーマカスタマイズ API- WordPressのテーマカスタマイザーにオリジナルの項目を追加する方法
- コピペで使えるWordPress テーマカスタマイザーAPI サンプル
WordPress カスタマイザーをカスタマイズする(動画の追加)